Where to download PHPLive software?
If you want to set phpLive application on your website, you would have to follow a couple of easy steps.
The first, and the most important one actually, is buying the product. Phplive is not free software, so you are not able to download it and use it on your account for free.
The purchase of the application can be made from the main site of phplive, here is a link to it:
http://www.phplivesupport.com/
If you want to test the application there is a free trial registration that you can set and test. The trial account is actually providing you the option to test the latest version of the application on the server of the developers for 10 days. Here is a direct link to the trial account submission page
http://www.phplivesupport.com/trial.php
After filling in the information that is requested, you will receive an activation email with a link to follow. Then you will be able to set a fully operational live chat that you can test.
PHPLive installation
If you decide to buy the product and use it, the next step to make is to install the phpLive application on your website.
The first step of the installation of phplive, is to download the copy that you have purchased and to download it to your own computer.
Once you have downloaded your own copy of phpLive, you need to extract the archive on your local computer and to upload the extracted data to your public_html folder. The extraction of the file can be made with any kind of archive software like WinZip, WinRar or WinAce for example. After the extraction you have to establish an FTP connection to your website (learn how to use FTP) and to upload the extracted files to a folder inside the public_html folder, for example the folder “phplive”.
During the upload you can complete another preliminary step. It is the creation of the database that the phplive application will use.
You can do that using the MySql databases option available in the control panel that you have. To access it, please login to your cpanel using
https://yourdomainname/cpanel
with access information:
username: yourusername password: yourpassword
When you reach the page what you have to do is to create the database that phplive will use. For completing that task use the option for add database.

Then you have to create the user that will use that will have an access to your database.
You can do that from the option of creating a user, you can find that field under the adding database one.

The last and the final step that you have to make in the MySql menu in the control panel is to allow full privileges for the username to the database that you have created. You can do that if you choose the both – username and database from the drop down menu available on the page and click on the button add user to database.

1. Start installation
Once you have uploaded the files and you have created the database and the username that the application will use, you have to access the files that you have uploaded using FTP.
In this example the files are uploaded to a folder inside the public_html one called – phplive, so if you do the same thing the address that you have to use to access the installation files is
http://www.yourdomainame.com/phplive
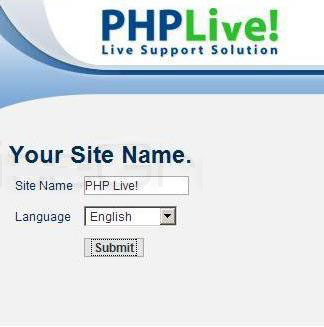
When you do that the application will automatically redirect you to the first page of the installation procedure. Which will look as it is showed on the picture above.
From that page you can set the languages that installation and after that the application have to use. The supported languages are – English, Dutch, Danish, Italian, Portuguese, Spanish, French, German, Romanian, Turkish. The other setting here available is the name of the site that you will use.
2. Setting up website root
On the second step of the installation you are choosing the absolute path to your phplive installation. It will be something similar than
/home/username/public_html/phplive
Actually applications usually detect this setting by default, so you don’t have to change anything here (unless, of course, you know what you are doing).
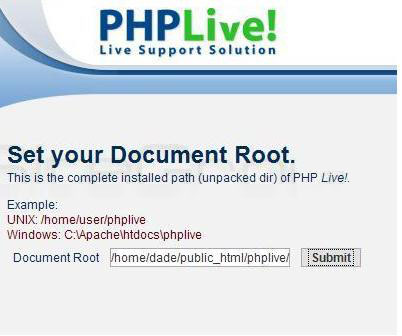
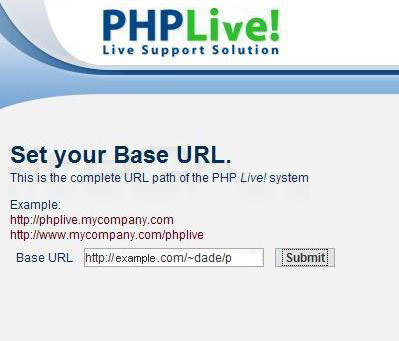
3. Set your Base URL.
In this step you are choosing the complete URL path of the PHP Live! system. For example:
http://www.yourdomainname.com/phplive
Like the step before you can simply agree with the default setting and go ahead to the next step with no worries.
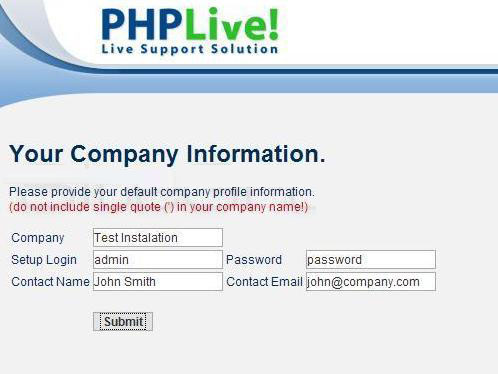
4. Your Company Information.
Here you should add information regarding your company and to set the administration username and password. You can check the picture below for example information that you can fill there
5. Configure Database.
This is actually the last step of the installation that you have to pass. The information that you have to fill in here is regarding the database that you have set up as explained above to the phplive application, so it will be able to use it.
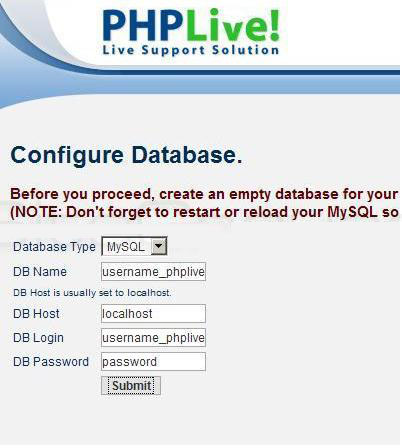
The only supported database from phplive is MySql, so on the first option there is no choice actually available. For the DB Host option by default it is set to localhost and in 99 % of the cases that is the database host that you have to use, the exceptions actually are if you have your database stored somewhere else, not in the account that you have with us and if that is your case what you have to fill in that option is the database server name and port number for access, for example:
DB Host: databaseserver:port
6. Congratulations
The very last page from the installation of phplive is a congratulations page that actually is praising you for the successfully completed installation.
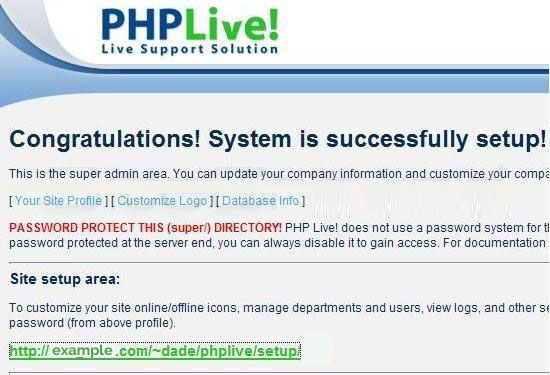
On this page there are four links available. The first three of them actually is leading you back to the settings that you have filled in the previous options in the installation. The last one is the very last thing on the page and it goes to the site setup area.
You can access that area manually with no problems if you type the link from the page on the address bar of your browser, for example:
http://www.yourdomainname.com/phplive/setup/
Once you access the setup page for your phplive installation you will be prompted with a menu that will ask you for your login information,
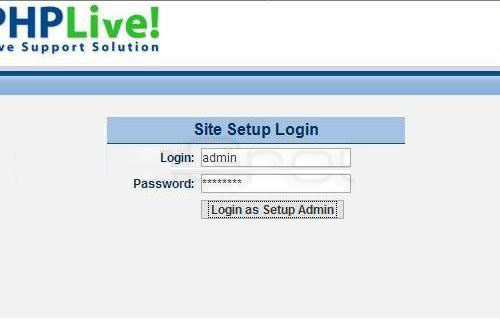
that information actually is the username and password that you have filled in the installation of the application.
When you login there you will see the configuration options for your phplive application, the screen will look like this:
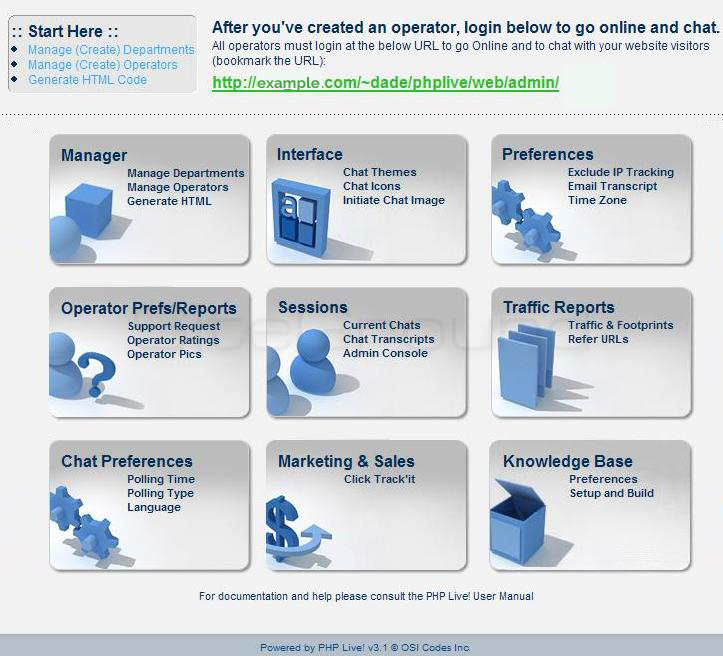
As you can see on the picture the configuration menu is grouped in different sections vie certain criteria and it is very easy to use, because of the fact that it is leading to every option that you want to manage only by few clicks.

 Phone: 1(877) 215.8104
 Login
Login