There are several gallery modules that are available for PHPNuke. The Coppermine gallery is probably the most famous and easy-to-use one, However, since Coppermine Gallery and PHP-Nuke are now incorporated into one application called CPGnuke and are not available for integration anymore, we are going to install ‘Em’s eGallery’ which is available for download here.
To install the gallery, you should first download the archive file and extract it on your local computer. This will create 2 new directories: db/ and html/. The db/ directory contains the database update script we will need in order to install the database structure for the gallery and the html/ directory contains the files needed by phpNuke for the installation. Please, open your favorite FTP client, connect via FTP to your web hosting account and navigate to the directory where phpNuke is installed. Then upload all the files and directories found under the html/ directory in the Gallery extracted archive file.
Once you complete the upload, you should import the database tables that come with Em’s eGallery script. To do so, please open your CPanel and select the phpMyAdmin tool. Click on it and a new page will load. From the drop-down menu at the left-hand side, please select the PHP-Nuke database you have created and wait for the right-hand side of the screen to update. Then click on the ‘SQL’ tab and paste inside the window the content of the ’emsgallery.sql’ file. Click on the Go button. In this way you will import the gallery tables in the PHP-Nuke Database.
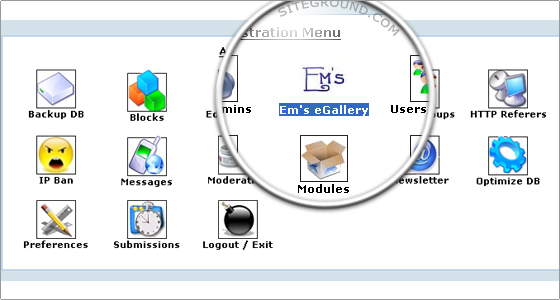
Once both the files are uploaded and the database is imported all you have to do is to configure your new gallery module. Please, go to your PHP-Nuke admin screen and click on the new icon for Em’s eGallery:

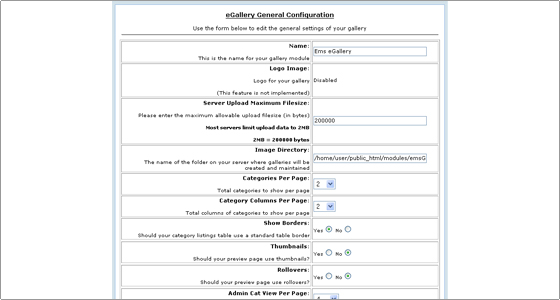
Scroll down a little and click on the ‘Gallery Settings’ link. From the ‘Gallery Settings’ page, please click on the Edit Gallery Config button. The only setting that you need to configure is the ‘Server Upload Directory’ value.

It should be:
/home/user/public_html/modules/emsGallery/images
where “user” should be replaced by your actual CPanel username. You can change the other settings according to your personal preference. Save the configuration and you will have a nice and simple to use gallery integrated into PHPNuke.

 Phone: 1(877) 215.8104
 Login
Login