 Phone: 1(877) 215.8104
 Login
LoginIn this tutorial we will provide you with detailed information on how to install Xoops on your hosting account and create a fully functional website with it.
- How to start a Xoops site?
- Logging into the Xoops Admin Area
- How to create new content?
- Manage Xoops
How to start a Xoops site?
![]()
All you need to do is open a hosting account, where you can have the Xoops application installed. FastWebHost offers a FREE Xoops installation! If you already have a hosting account, you can check here how to install Xoops.
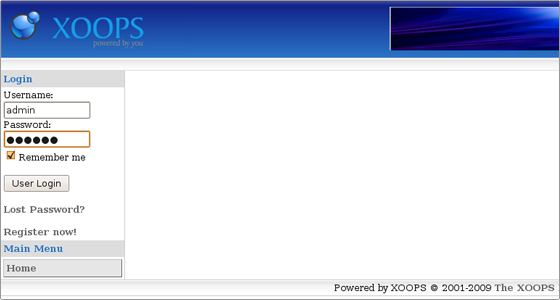
Logging into Xoops Admin Area
To log in your Xoops Admin area, after installing the Xoops application, you simply need to enter your administrator’s credentials into the Login form on your main Xoops page:
How to create new content?
You can create new content on your web site from the Xoops main page -> Administration Menu -> System -> Blocks.
At the bottom of the page you will find the option to add a new block.
There you can enter the content which will be visualized in it along with its location:
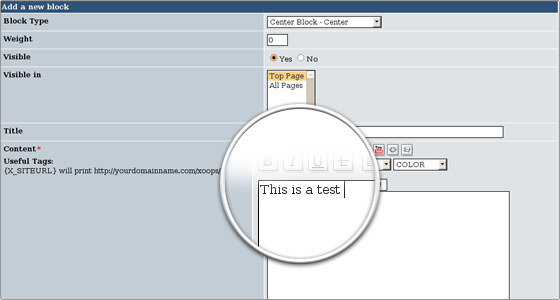
The new block fields are as follows:
Block Type – You can pick between a side and a center block. Also, you can define its position. Weight – Here you define the order of the block. The 0 value will put it on the top and the higher value will push it towards the bottom.
Visible – Set the value to yes if you want the block to be visible.Visible In – Defines whether the block to be seen on the homepage (Top Page) or on all of the pages. Title – Enter the title of your block.Content – Enter your content. You can change the color, font, size, include pictures and external media.Content Type – Select the type of the content. It can be PHP, HTML or Auto formatted text.Cache Lifetime – Here you choose how long you want the block to be visible.
How to manage Xoops?
You can manage your Xoops CMS installation from the admin area:
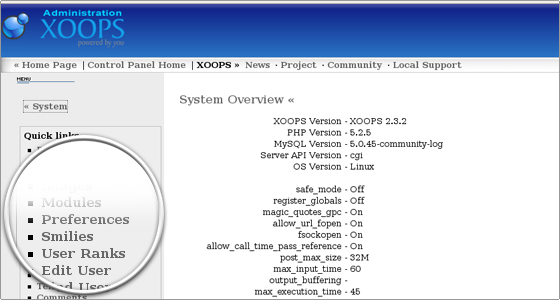
There you can add new banners and blocks, manage groups and users, smilies, templates and avatars, adjust the preferences.
 If you are just starting your Xoops site, or would like to find a faster and more experienced hosting provider, FastWebHost is the best Xoops host!