In order to configure your domain name to work with Google Calendar there are several steps you need to accomplish. You will need to create a new CNAME record pointing to Google in a manner similar to verifying your domain name for Google Apps.
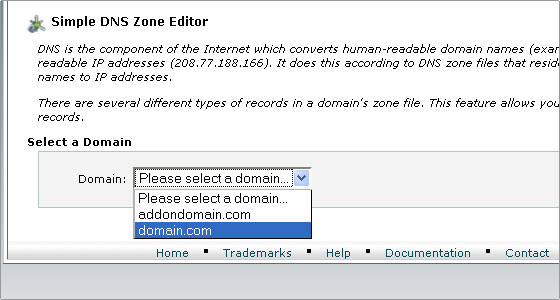
Login to cPanel for your hosting account. Go to Simple DNS Zone Editor. Select the domain name you would like to setup with Google Calendar from the “Select a Domain” drop-down menu.

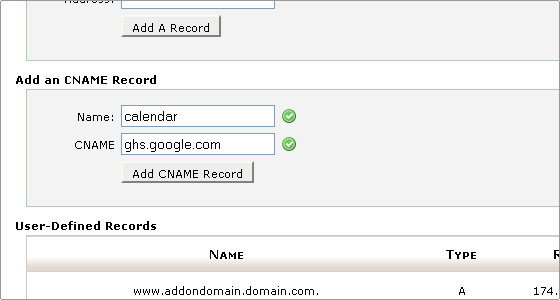
In the “Add an CNAME Record” section enter calendar in the “Name” text box and enter ghs.google.com in the “CNAME” text box.

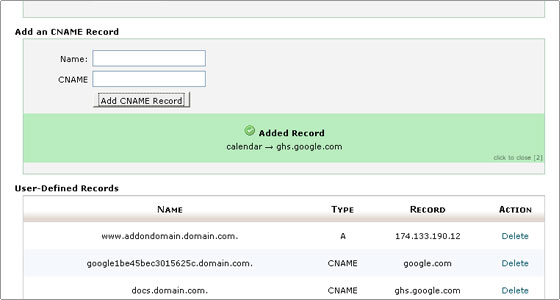
Then click the Add a CNAME record button. A confirmation will appear that the CNAME was added successfully.

Now that you have configured your domain for Google Calendar, you need to change the Google Calendar URL in Google Apps so that you can access it through your domain. Follow the steps below to complete the setup:
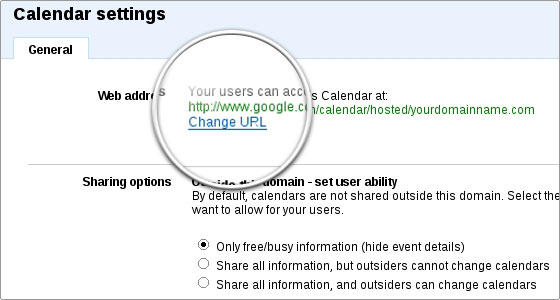
- Go to your Google Apps Dashboard > Calendar.
- In the Web address section, click Change URL.

- Select the second option and type the name of the subdomain you want to use for accessing your Google Calendar through your domain. In our case we’ll leave the default subdomain calendar. To proceed, click Continue.

- To complete the process, click I’ve completed these steps.

Once your Google Calendar is configured and the DNS changes propagate, you will be able to access it directly through http://calendar.yourdomainname.com.

 Phone: 1(877) 215.8104
 Login
Login